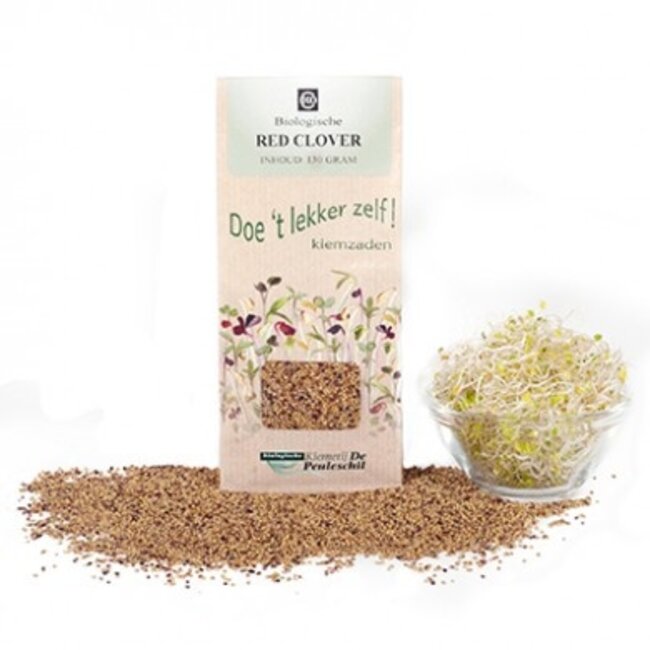
In a busy and demanding daily life, maintaining a natural balance and vitality can be a challenge. When you are looking for a simple and responsible way to enrich your daily routine with fresh, vital nutrients, growing your own sprouts offers a reliable solution. Peuleschil Red clover organic offers you organic red clover seeds with which you can grow young, fresh sprouts in your own kitchen. These sprouts form a natural addition to a varied diet and gently support your conscious, healthy lifestyle.
Key benefits
- Organic quality: The seeds are of controlled organic origin, allowing you to grow sprouts that are free from unwanted additives.
- Fine structure: Red clover sprouts have a finer structure than Alfalfa, which provides a subtle bite and a refined taste in your dishes.
- Easy to grow at home: With minimal preparation and a preserving jar, you can grow your own fresh sprouts within a few days.
- Versatile application: The young sprouts are perfect as a fresh garnish on salads, sandwiches, soups, or in healthy bowls.
How it works
Sprouts belong to one of the most vital stages of a plant. By activating the germination process at home with water and air, the natural reserves in the seed come to life. Red clover is closely related to the well-known alfalfa and is known for its sprouts growing quickly and developing a mild, fresh taste. Growing these sprouts yourself ensures that you always have access to the freshest form of active nutrients, directly from the windowsill to your plate. This makes it a valuable and simple step within the daily care of yourself and your family.
Composition
| Property | Specification |
| Product type | Organic seeds for sprouts |
| Variety | Red clover (Trifolium pratense) |
| Content | 135 grams |
| Origin | EU/Non-EU agriculture |
| Certification | Organic |
Ingredients
Organic Red clover (Red clover seed).
Usage & Dosage
1. Place one to two tablespoons of seeds in a preserving jar and add plenty of lukewarm or warm water. Any glass jar is suitable, provided it is large enough (at least 1.5 litres) and the neck does not narrow too much.
2. Secure a plastic or fibreglass mesh screen over the jar with a sturdy elastic band. Preferably do not use aluminium mesh, as this is sometimes treated against insects.
3. After the soaking time of approximately 6 hours, drain the water, rinse the seeds carefully, and drain the water well again.
4. Place the jar at room temperature, tilted upside down in a colander, rack, or container so that excess water can drain away completely. The water that remains on the sprouts is sufficient to keep the germination process going. It is important that the seeds or sprouts do not cover the entire mesh for good air supply. Therefore, distribute the seeds along the length of the jar after each rinse. Never place the jar on the heater or in direct sunlight.
5. Rinse the sprouts three times a day during the growing period of approximately 4 days and always place the jar back tilted upside down.
6. After the very last rinse, let the sprouts dry in the jar (tilted upside down) at room temperature for at least 18 hours before consuming them or storing them in the fridge.
If desired, the last rinse can be replaced by a washing action to remove the hulls from the sprouts. To do this, fill a small basin to the brim with lukewarm or warm water, wash the sprouts loose in it, and skim off the hulls by waving them over the edge. Scoop the sprouts out of the water by hand, put them back in the jar with the mesh, and let them dry for at least 18 hours.
Store remaining sprouts chilled (maximum 7 degrees Celsius) and covered (but not airtight).
Safety & Disclaimer
Ensure good hygiene and clean materials throughout the entire germination process to prevent unwanted mould growth. Use only drinking water for rinsing. This product is a natural food item and should be used as part of a varied and balanced diet and a healthy lifestyle. Store the dry seeds in a cool, dark, and dry place.