Mustard seeds can be used for various purposes. For example, the seed can be used as a spice or for making vinegar. But you can also let it germinate, which creates a spicy sprout vegetable. Delicious in a salad, for example, or Read more.

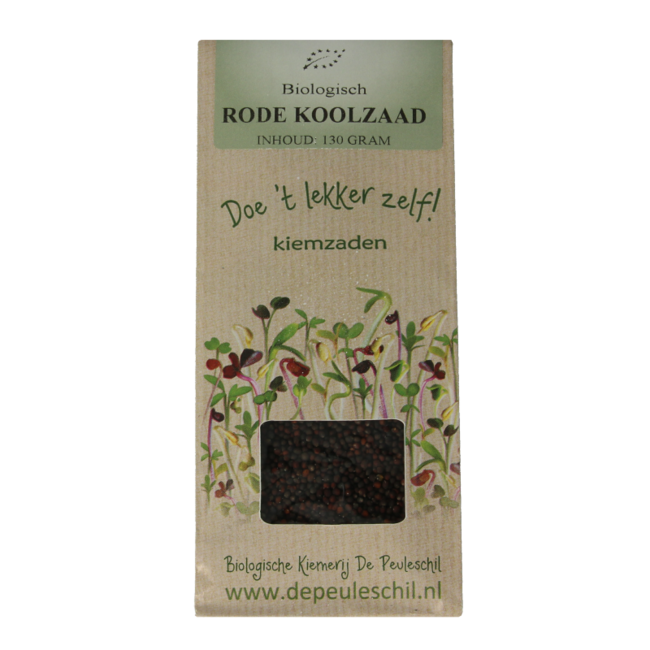
A busy family life and a full schedule sometimes make it difficult to put enough variety and fresh nutrients on the table every day. This can be at the expense of your energy level and overall vitality. Fortunately, enriching your meals does not have to be complicated. With the organic red cabbage seeds from De Peuleschil, you can easily add a healthy, crunchy, and tasty dimension to your daily routine. By germinating these seeds at home yourself, you can create a fresh and nutritious sprout vegetable in no time that gives your meals an instant boost.
The germination process activates the dormant nutrients inside the seed, creating a young plant that is rich in active elements. Although mustard seed is often known for its culinary applications such as making vinegar or as a spice, germinating red cabbage seed yields a deliciously spicy sprout vegetable. This process ensures optimal nutrient absorption and naturally supports your daily well-being. VitAdvice, as your trusted health partner, helps you to easily integrate these healthy habits into your lifestyle.
| Feature | Specification |
| Product | Red cabbage seeds organic |
| Brand | Peuleschil |
| Content | 130 grams |
| Weight | 1.000 kg |
| Origin | EU/Non-EU |
| Certification | Organic |
Organic red cabbage seed
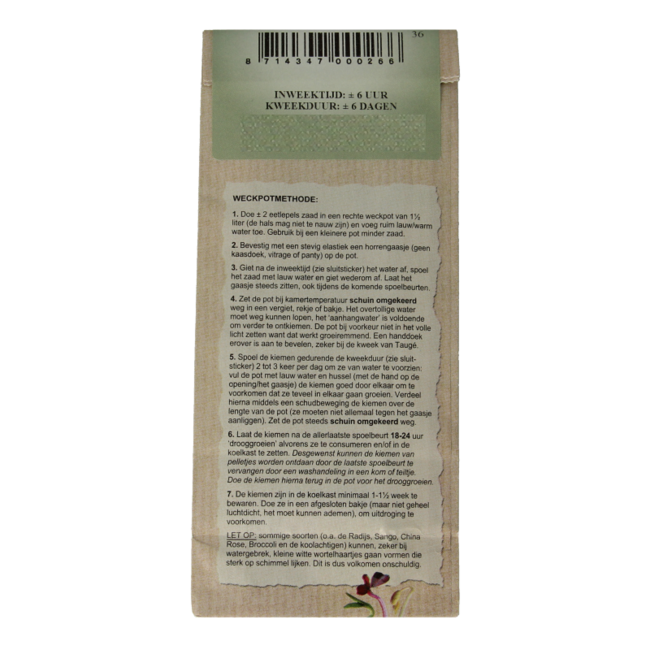
1. Put one to two tablespoons of seeds in a preserving jar, and add plenty of lukewarm/warm water. [Any glass jar is suitable, provided it is large enough (min. 1½ litres) and the neck does not narrow (too much).]
2. Attach a plastic or fibreglass fly screen to the jar using a sturdy (postman's) elastic band. Preferably do not use an aluminium fly screen because it is sometimes treated against insects.
3. Drain the water after the indicated soaking time¹, rinse the seed, and drain the water again.
4. Place the jar at room temperature at an angle upside down in a colander, rack, or container so that the excess water can drain away.
[It is important that all the water can drain away; the water that remains on the sprouts is sufficient to keep the germination process going. It is also important that the seed/sprouts do not cover the entire mesh. For a good result, it is of great importance that there is sufficient air supply. Therefore, distribute the seed/sprouts along the length of the jar after each rinse.]
Do not place the jar with seeds/sprouts on the heater or in full sun!
5. Rinse the seed/sprouts during the indicated cultivation period² ± 3 times a day, and then always place the jar at an angle upside down.
6. Let the sprouts in the jar (at an angle upside down) dry-grow at room temperature for at least 18 hours after the very last rinse* before consuming them and/or putting them in the fridge.
* If desired, the last rinse can be replaced by a 'washing action' to remove the hulls from the sprouts:
-Fill a small basin or similar to the brim with lukewarm/warm water.
-Put the sprouts in this, and 'wash' the sprouts loose.
-Skim off the hulls by 'waving' them over the edge of the basin.
-Scoop the sprouts out of the water by hand, and put them back in the jar.
-Attach the mesh again, place the jar at an angle upside down, and let it dry-grow at room temperature for at least 18 hours.
Store remaining sprouts chilled (max. 7°C) and sealed (not airtight).
¹ Soaking time: ± 6 hours
² Cultivation period: ± 5 days
Never place the jar with seeds or sprouts on the heater or in direct sunlight to prevent unwanted bacterial growth. Ensure a hygienic working method and sufficient air supply during the entire germination process. Always store the harvested sprouts chilled (maximum 7°C) in a sealed, but not completely airtight container. Sprout vegetables are a healthy and natural addition to your daily diet, but should not replace a varied and balanced diet and a healthy lifestyle.